Ashford 80cm table room challenge for 27″ wide Houndstooth
Practice for my cushion cover project
We have several cushions of different sizes that have been used in our home for many years: squares measuring 40 cm, 50 cm, and 60 cm. They have become quite frayed, and it’s about time to replace their covers. It would be ideal to make cushion covers with my own handwoven fabric, but I’ve been hesitant because I’m not very confident in attaching zippers, so I’ve been reluctant to start.
One day, while searching the Internet for information on hand-woven fabrics, I was lucky enough to find an article on a very kind Yarn Shop blog about cushion cover design called “Gradient Throw Pillows”.
「Gradient Throw Pillows」By. gistyarn.com
https://www.gistyarn.com/blogs/journal/gradient-throw-pillows
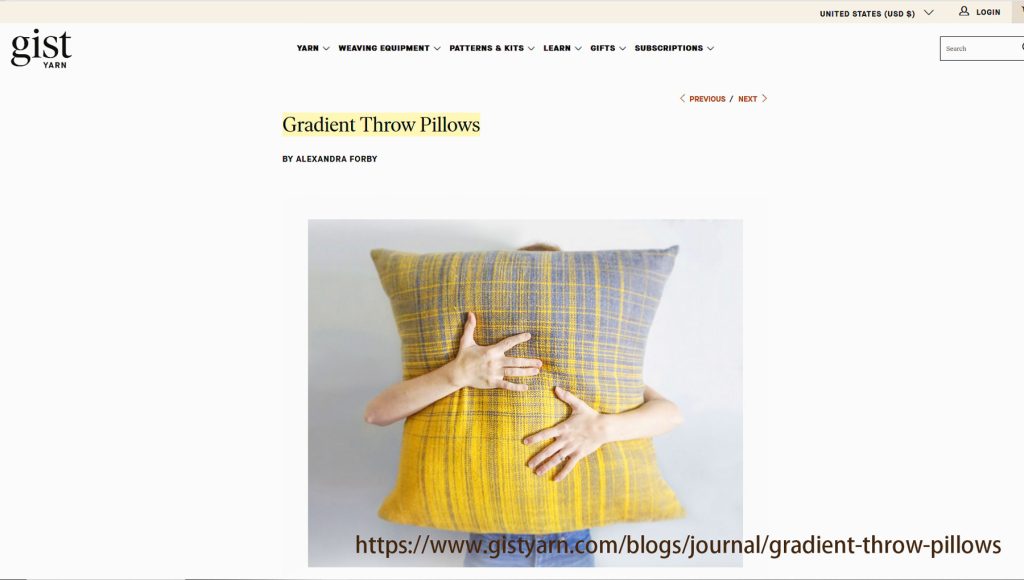
The design is so cool, with only two colors, yellow and gray, in a current style gradient, designed to produce a well-balanced gradation in the warp and weft yarns! As I read through the article, I found the project information carefully and meticulously presented. And it can be completed without a zipper. “This is it!” I thought, and I was motivated to create the cushion cover.
Challenge
After giving it some thought, I realized there are two technical challenges I must overcome with my handweaving skills. First, can I precisely match the predetermined dimensions with my handwoven fabric? This seems quite difficult. I must consider the density of the weft and the shrinkage in both the weaving process and after washing, which together amount to approximately 10%.
The second issue is whether it can be made into a beautiful rectangle. The one I wove for practice in the past had an irregular shape and ended up looking rhombus like. I have also experienced that the width was not uniform and it ended up looking like a spool of thread. If a beautiful rectangle is not produced, there will be a large discrepancy when finishing with a sewing machine.
One possible improvement based on my experience so far is warp tension. Is it possible to wind all warp threads with uniform tension in the preparation stage? This is the most important and the most difficult. I have changed the method of warp preparation and hanging three times and have gradually improved it, but the tension at both ends still tends to be loose.
Even though there are many challenges I decided to try.
Project Notes
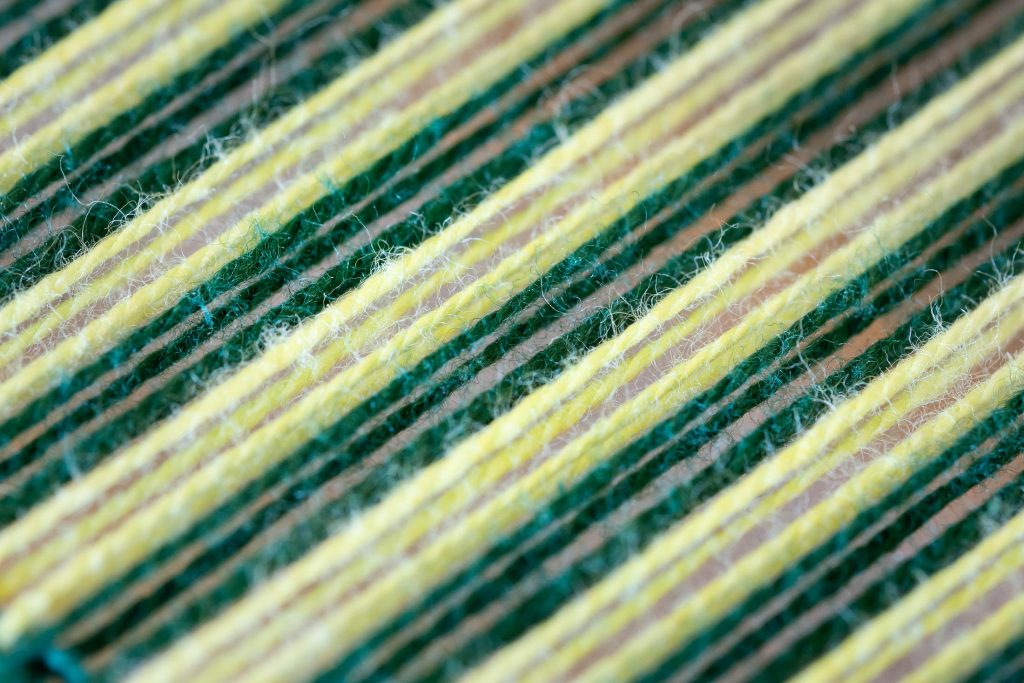
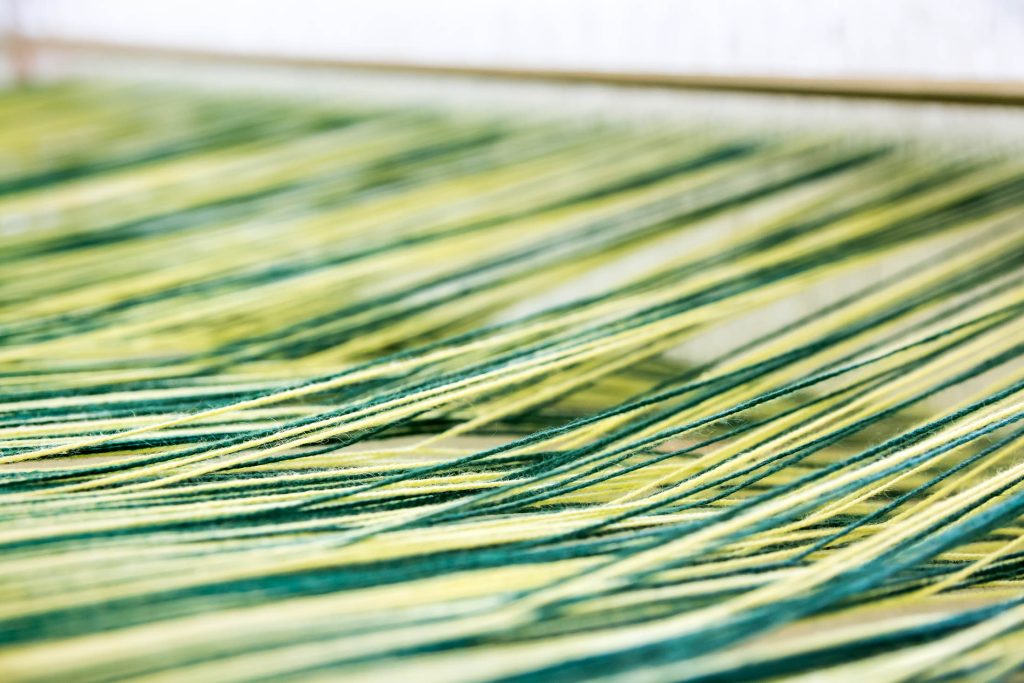
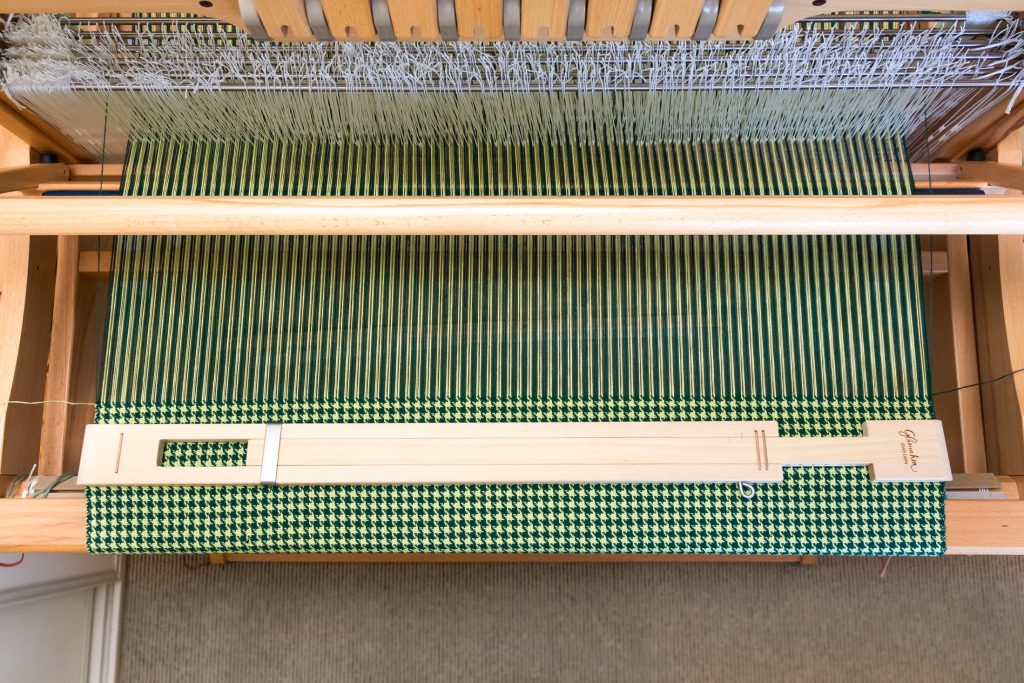
- 8/2 Cotton Yarn (Dark Green and Light Green)
- Reed: 48/10 (12 DPI)
- 24 EPI
- Warp ends: 660 / 27.5″ (70cm)
- Final Size: L: 120cm~ W:63cm
- Used 2 boat shuttles
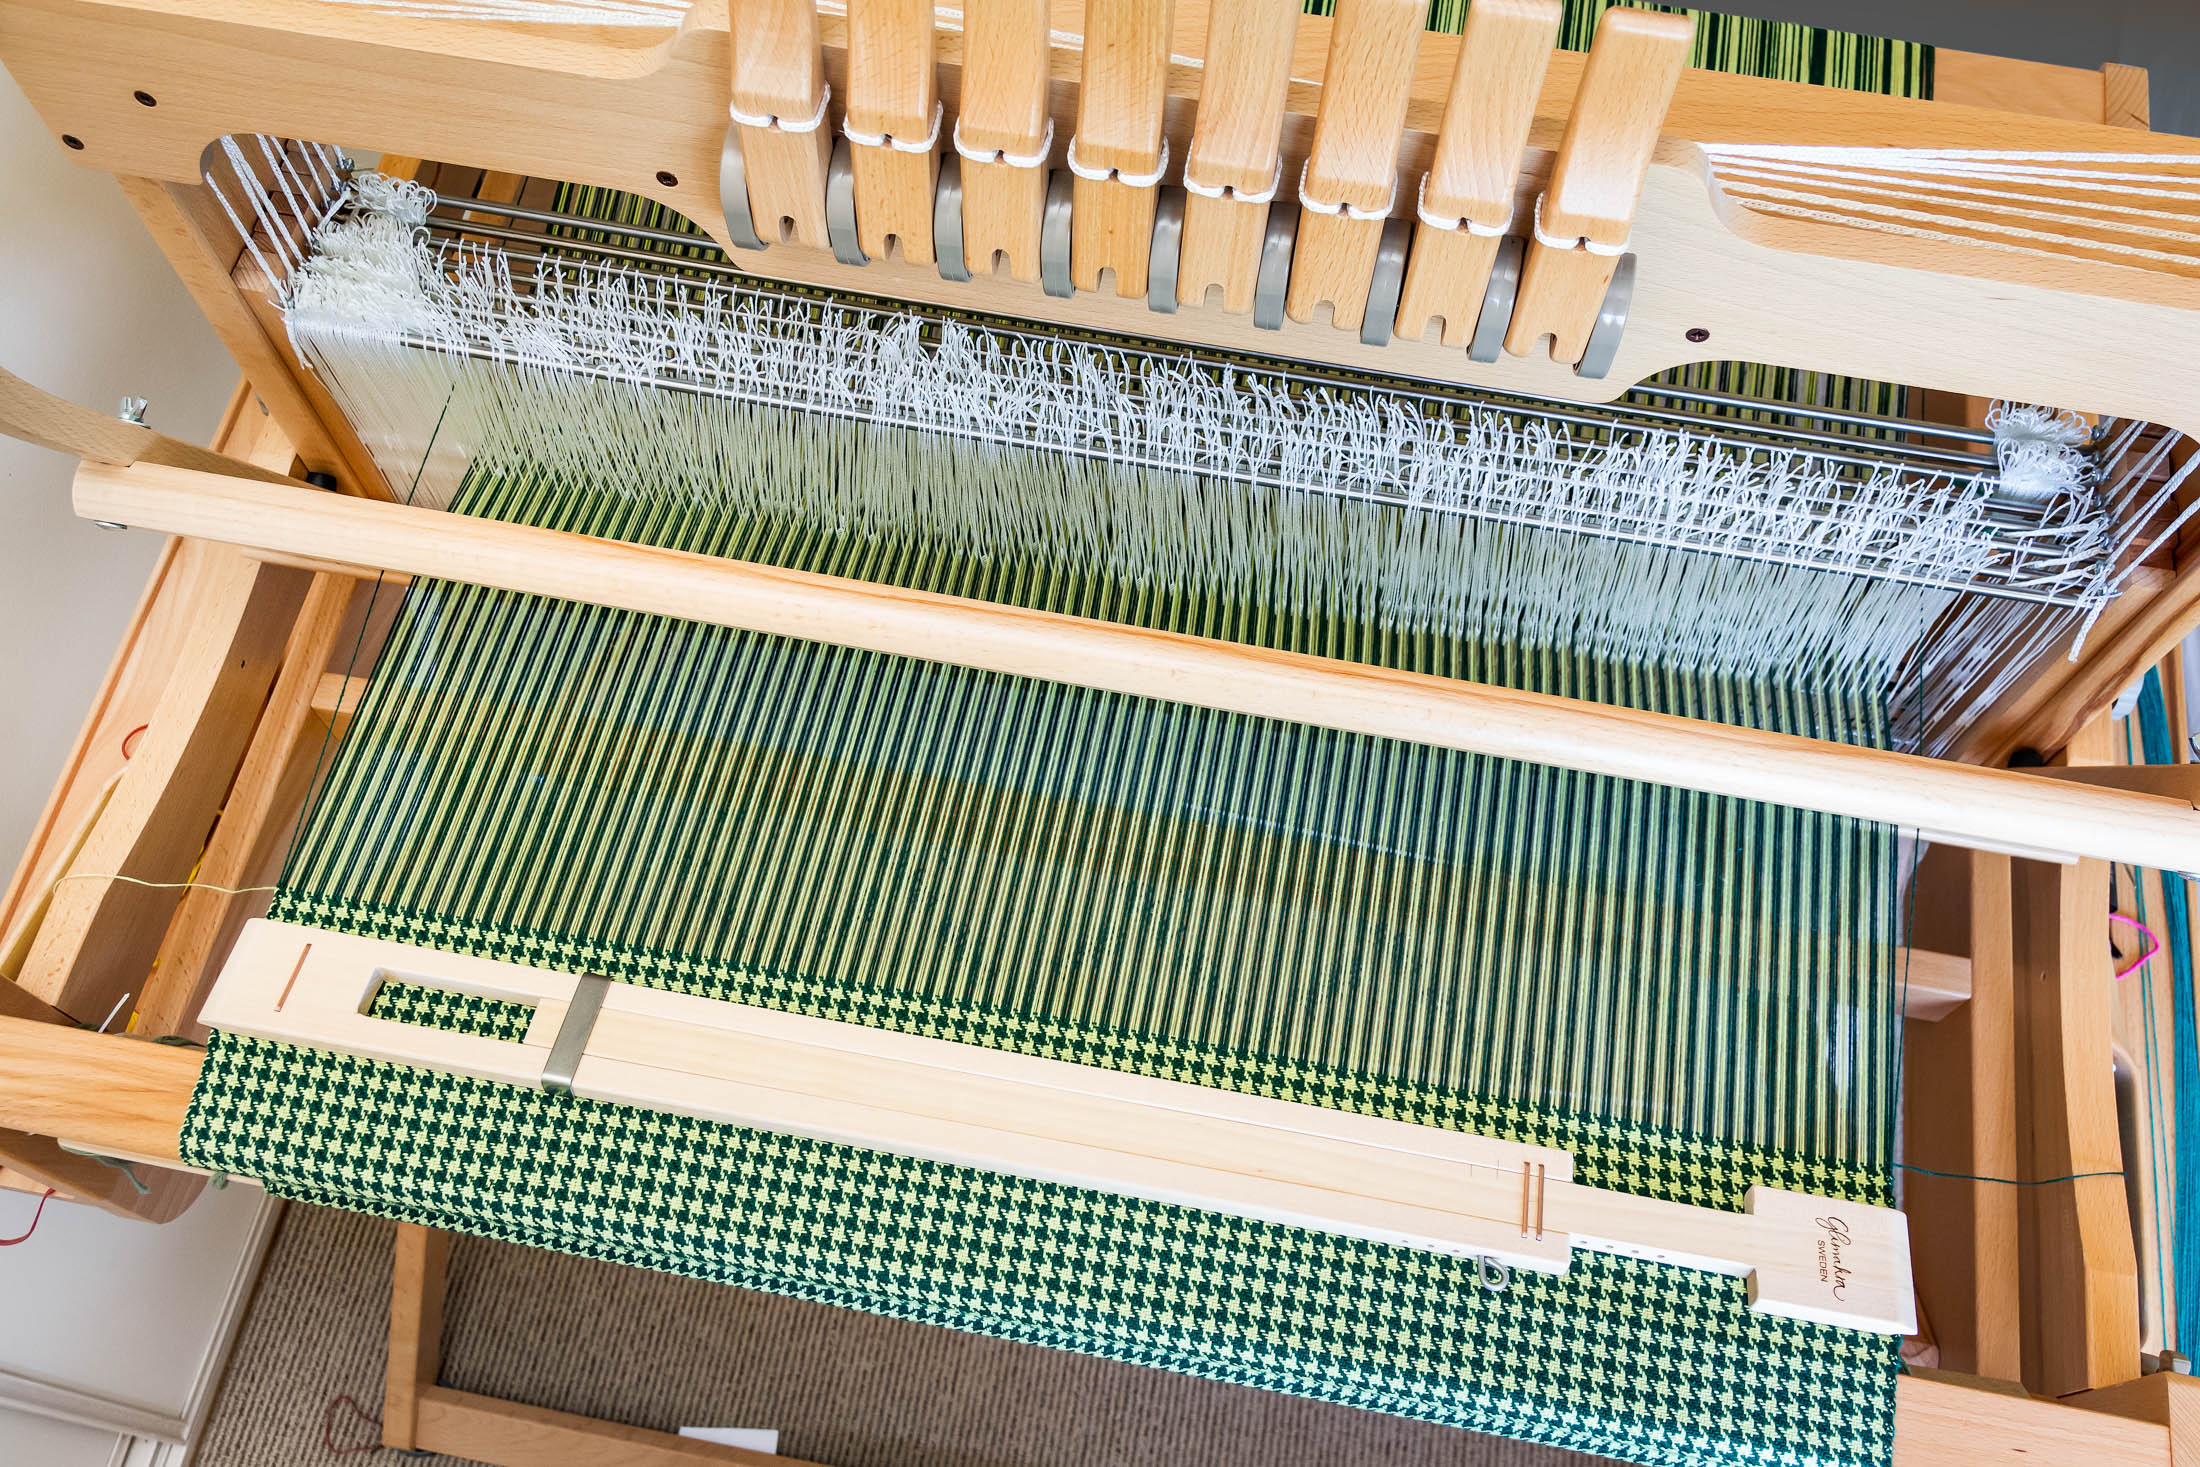
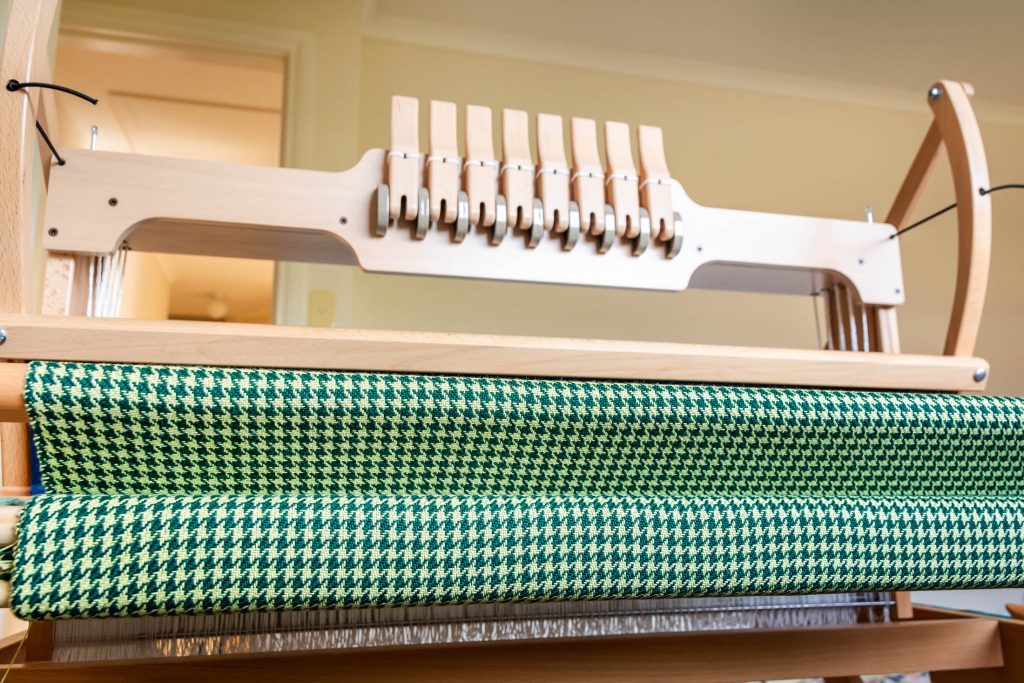
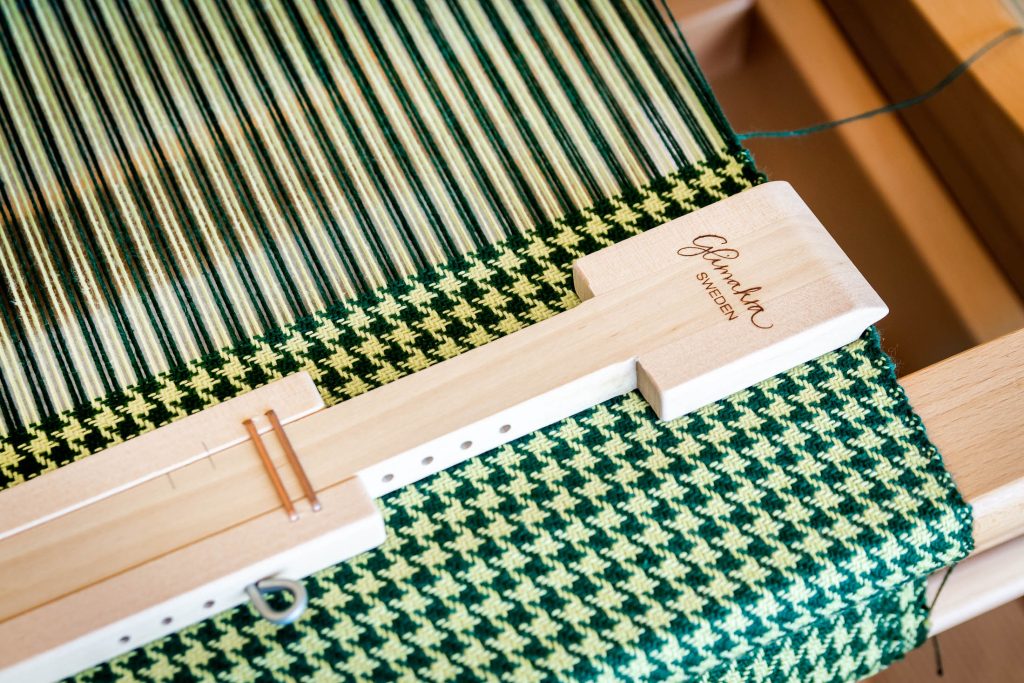
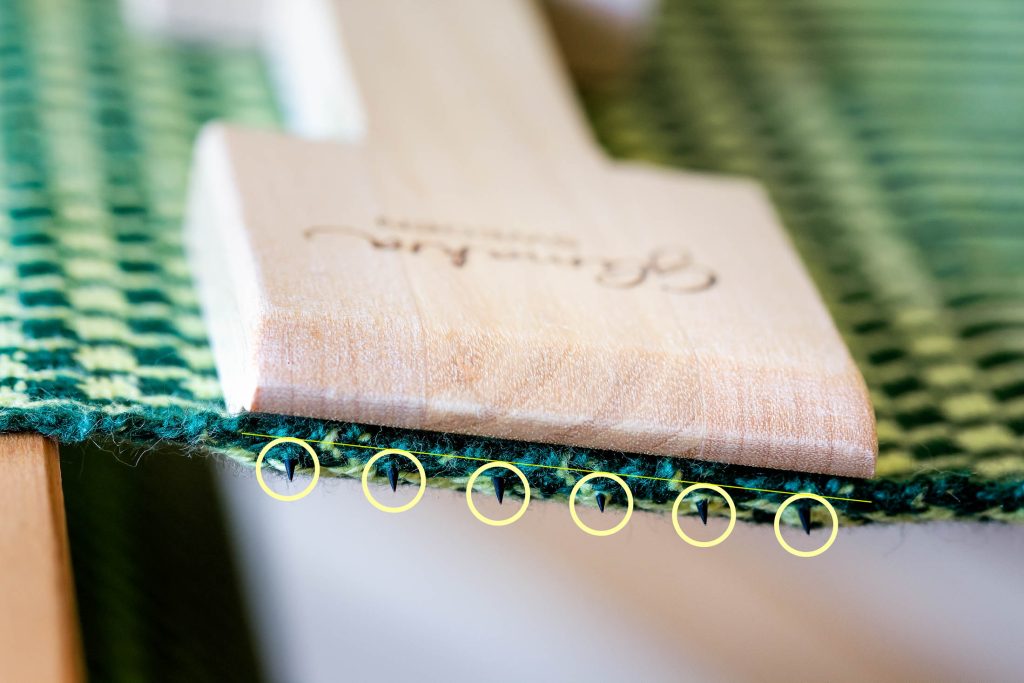
- Temple (Gilmakra)
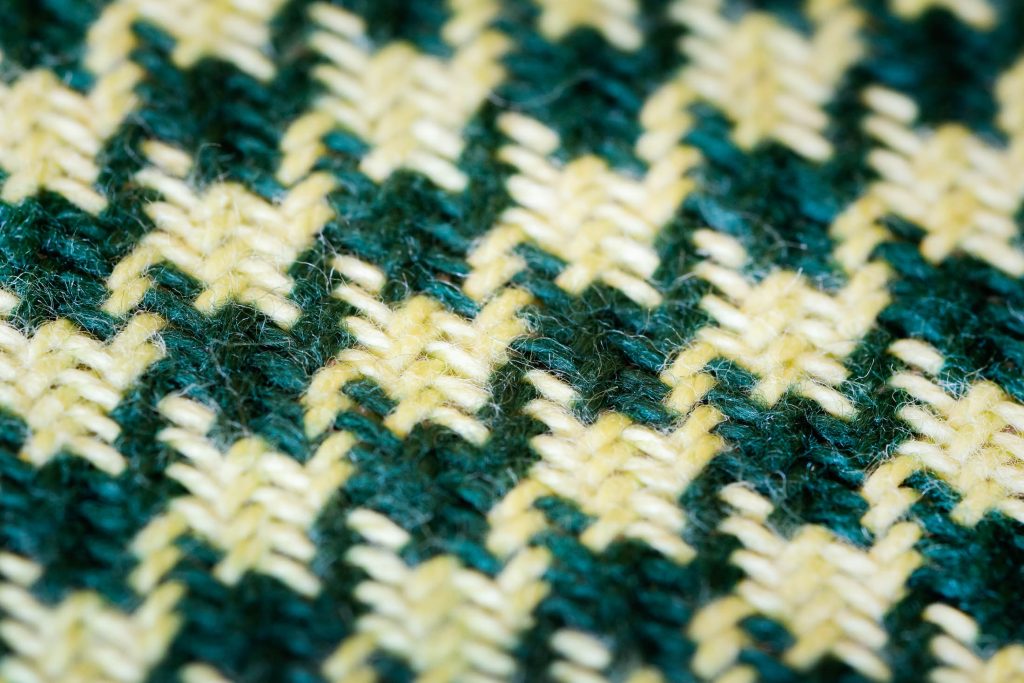
Pattern
- Beginning and End: Twill (Just an inch)
- Main part: Tabby
- Threading: 1,2,3,4, 1,2,3,4…..
- Tie up: 4shafts – 1,2 / 2,3 / 3,4 / 4,1
Aim for the practice
- Skill improvement for the next cushion cover project
- Nice rectangular shape
- Even Tension warps
- Weave nice and straight
- Beautiful edge
Practice
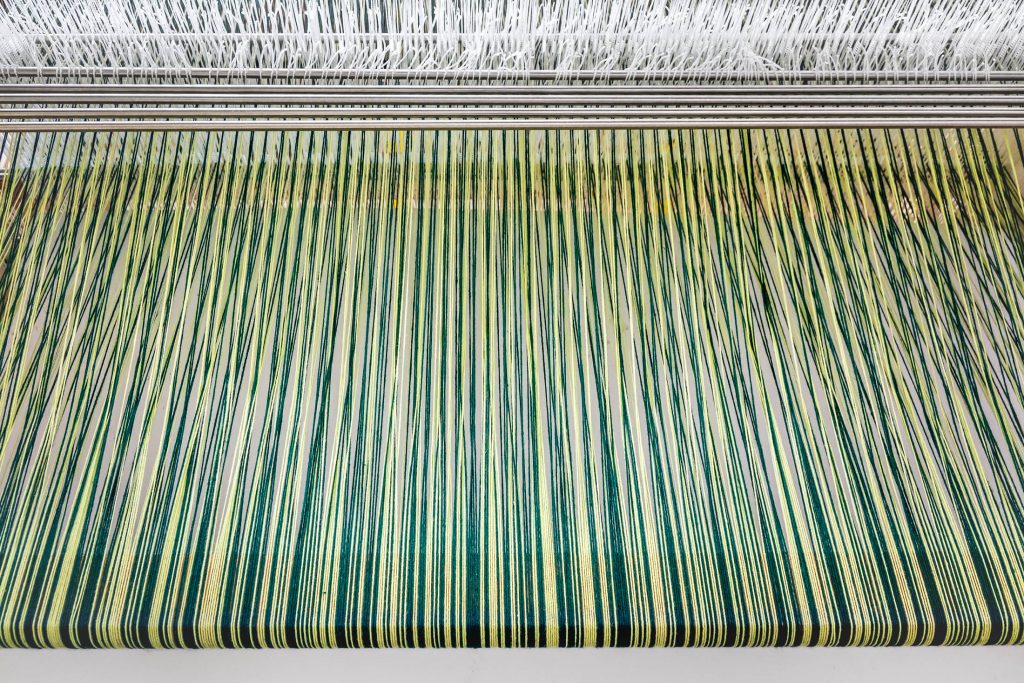
The houndstooth pattern is a simple twill weave, so it’s not difficult. This time, I focused on maintaining a straight width, but because the width was almost twice the usual at 70 cm, the tension at both ends became loose. To save time, I used a Warping Mill for warping. When using a Warping Frame (a standard warping board), threading in a compact manner while layering the threads one on top of the other in sequence results in a neatly arranged warp. However, with the Warping Mill, the winding tends to be rougher, and the order of the warp threads inevitably gets mixed up, resulting in the warp threads crossing at the back of the heddle as shown in the photo.

I always create a bundle for dividing next to the Raddle Cross (a cross made at the end opposite the start of the warp for division purposes) every time. This is for placing on the Raddle (a wooden base with nails at set intervals) when threading the warp onto the table loom, creating bundles by wrapping the remaining thread around 12 threads at a time (since it was 12 DPI this time) to divide by one inch on the heddle. Therefore, in bundles of 12, the order should be correct.
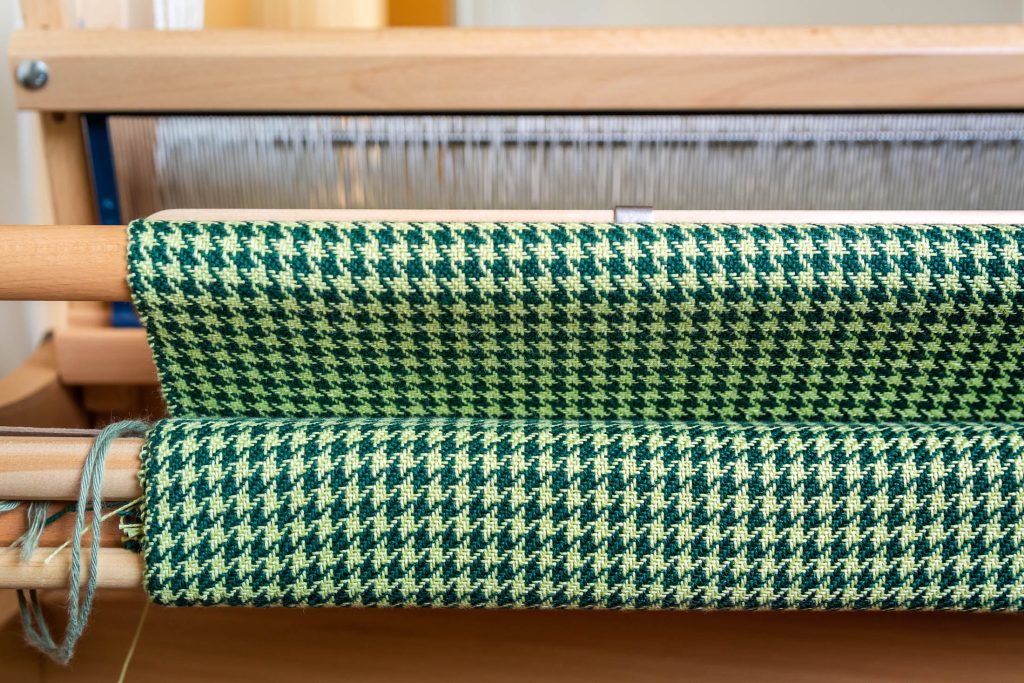
Using Temples
Temples are a very useful tool for maintaining width. As I am mentioning at the end of this post, this practice project resulted in slightly trapezoid shape. I assume this was due to weak tension at both ends. The length of these temples can be adjusted in 1 cm increments. It has sharp needles at the both ends.
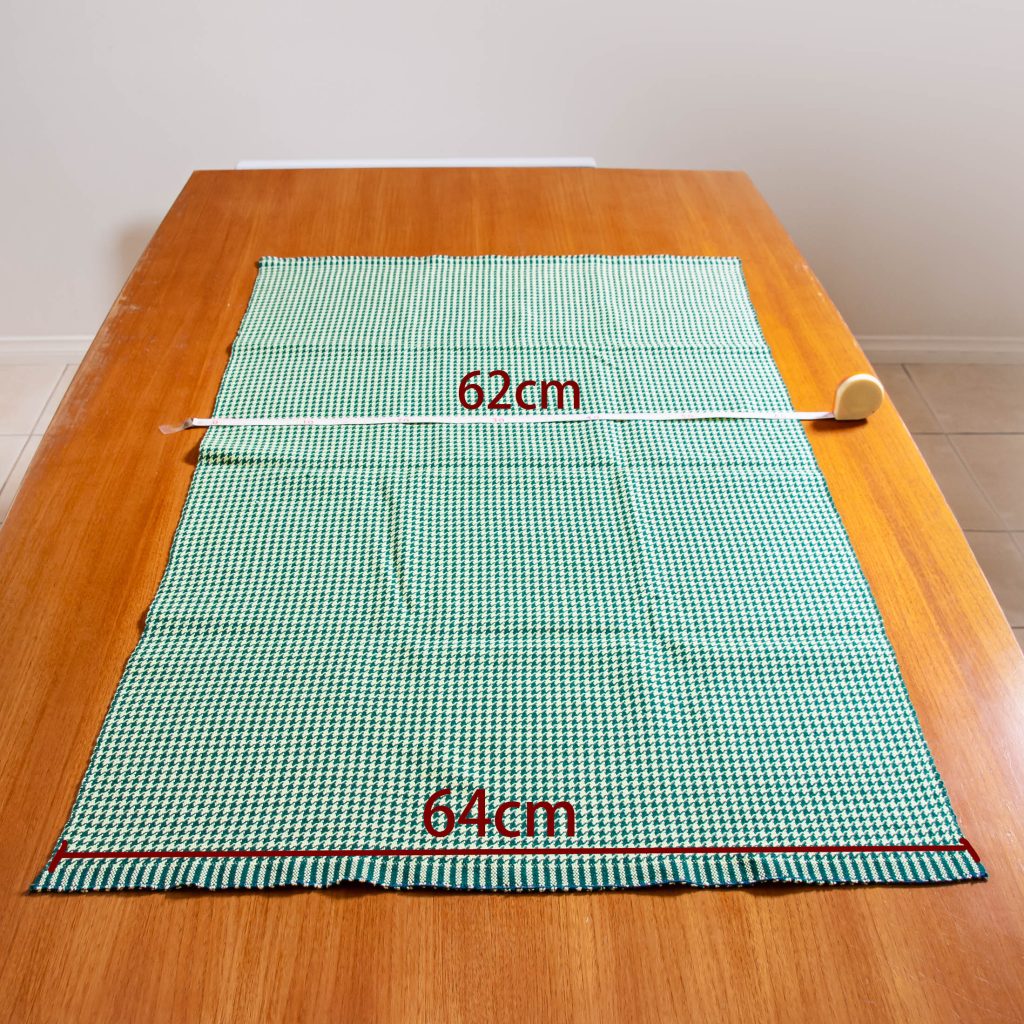
Result
The finish was fairly good, I am happy with it. I paid attention to maintaining a uniform width, but loading the warp chain to the loom was somewhat lacking, resulting in the fabric slightly taking on a spool-like shape. After wet finishing the fabric and ironing it for accurate measurements, I found that the width at both the beginning and end was about 63.5 cm, tapering to about 62 cm towards the center. This shape was influenced by using Tabby weave for the 1-inch sections at the start and end. Twill weave, having more horizontal elasticity than Tabby weave, tends to shrink more. I don’t believe the twill section’s density is too loose, but increasing the density could also reduce the effects of shrinkage. It’s uncertain without actual testing, but using three threads per slot in a 10 DPI reed (30 threads per inch) might make achieving the desired width easier, though it could slightly compromise the fabric’s softness and comfort.
The uneven tension in the warp threads means that the weaker tensioned threads need to be pulled tighter to be properly tensioned, which could lead to over-pulling the warp threads. However, the first step should be to ensure that the tension is uniform across all threads.